Saturday, January 30, 2010

LEGO Steampunk yacht

So I figured I should at least post something, and therefore I'll post, for now, others' LEGO work.  There is an abundance of amazingly creative stuff out there, all user-imagined, designed and built.  Below is one I just found recently.  If you don't know what "steampunk" is, check out the steampunk Wikipedia page for a quickie intro.  Note that other sort-of-related genres include "dieselpunk", "cuberpunk" and others.


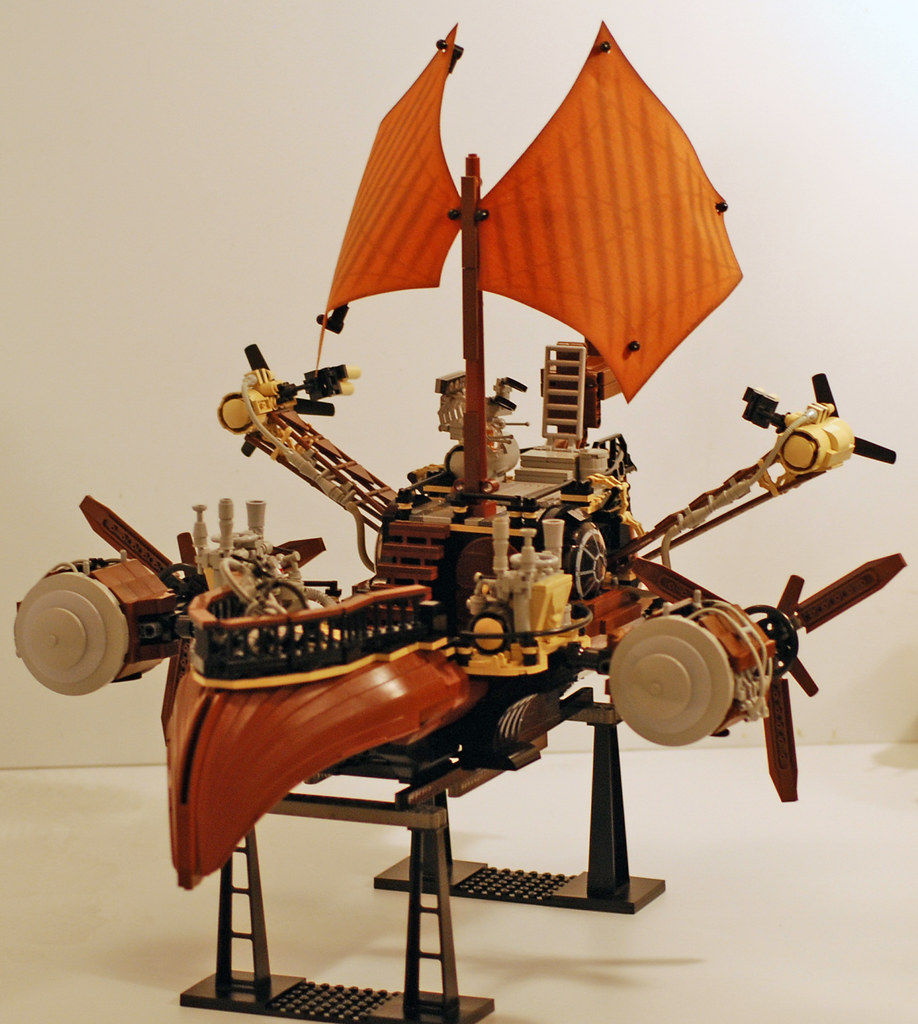
The relevant Flickr webpage is here with lots of snapshots.  Perhaps this isn't your particular taste, but I love this one.  The overall look is fantastic ... and fantastical (one of those odd science fictional or fantasy-ish words).  The design is absolutely unique.  Check out the front of the hull.  That large piece is upside-down.  We have one; if I recall correctly it is from one of the LEGO Castle line of sets, the big bad guy ship.  And he placed it upside-down!  That is hard!  In one of his comments he mentions that it was a challenge to go the SNOT route (LEGO fan terminology for building with the "studs not on top") and make the whole structure sturdy enough to keep itself together.  And the details he put into the model as a whole are equally astounding.

So, it looks exceptionally cool and it was a challenge to build.

Monday, November 9, 2009

LEGO wall textures

I figured I'd start this blog off with something simple (no idea when I'll get to "complex").

Late one night I was playing with some 2x2 bricks and ended up with some simple "textures", for lack of a better word, basically placing the bricks together in various ways.

Wall #1 (inventive name, huh?):


Sorry for the fuzzy picture.  I just found out that black is NOT a very good color to photograph.  Oh well ... Basically, most of the bricks are only connected to one stud on the brick beneath them.  Makes for a nice stepped look, I think.

Wall #2 "front":

and "back":

In this texture, I think (I really can't remember ...) I placed each brick on one and two studs of the two bricks below.

Wall #3:

For this wall I placed each brick on opposing studs on the bricks below.  Since they are therefore "hinged" in this way, I simply turned them in different directions.  Made for a nice texture.

I liked this one enough that I played just a bit more with it:

I simply rolled the two ends around to meet one another and mated them.  Makes a nice tower of sorts.  The pentagon on the top is exactly mimicked on the bottom, and therefore this cannot be placed directly onto other bricks.

Credit: I did get some impetus for playing like this from Tinkernology's blog (http://tinkernology.blogspot.com/2009/10/fridays-idea_30.html).  Very good blog; check it out.